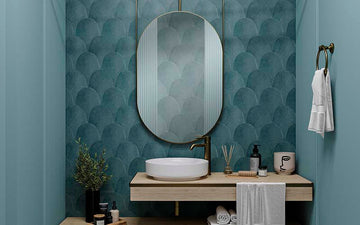
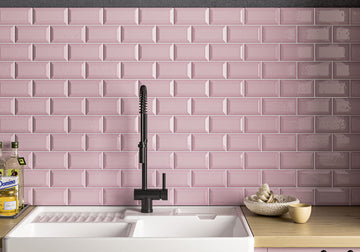

Looking for a wall covering that looks exactly like high-end ceramic wall tiles or luxury stone? Reco Surfaces’ acrylic and PVC panels are a hassle-free, cost-efficient way to cover any surface apart from floors. Often used directly over the top of old kitchen and bathroom tiles, Reco panels quickly cover large areas to give you a seamless, high quality finish that lasts and lasts. Here’s how to measure and fit our panels with minimal waste.
How do I calculate how many panels I need?
Reco Surfaces acrylic and PVC panels are supplied in several sizes, including portrait and landscape orientations. Our most popular size is 1220 x 2440mm, which is the industry standard for all sheet materials. Each sheet has a total area of 3m², making it easy to calculate the number of panels you’ll need. Simply multiply the length by the height of the wall you’re covering, add 10% for waste, and divide the answer by three. That’s the number of Reco panels you’ll need.
Why so little wastage?
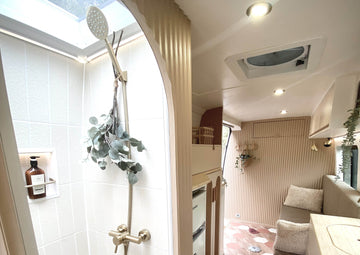
If you’re fitting Reco panels in a shower enclosure or wet room, the long lengths make it possible to cover from floor to ceiling with no horizontal joins. In this scenario, you’ll just need to work out how many panel widths you’ll need, and order accordingly. It might be possible to use the cut-off ends of long panels above door and window frames, or in window reveals.
If you use Reco panels this way, fitting the sheets is very straightforward, resulting in fewer errors and leaving very little leftover material at the end. Simple projects with square cuts will obviously have less waste than those with intricate curves or lots of angled cuts.
Plan your project carefully in advance to maximise the use of each panel. Always round up your measurements and, if you’re unsure, err on the side of caution by ordering slightly more than you need. It’s better to have a little extra material than to run short during the project.

How to cut Reco panels
You can use standard tools to cut Reco panels accurately and safely. Most of our acrylic panels are just 3mm thick, meaning you can easily cut them using a sharp Stanley knife and a metal straight edge. You can also cut these sheets using a fine-toothed saw if you wish, but a knife is really all you need.
For the slightly thicker acrylic panels and our fire-rated PVC sheets, we recommend using a jigsaw with a fine-toothed down-cutting blade. Use a standard hole cutter to allow for pipes, and a track saw works perfectly for cutting long lengths.
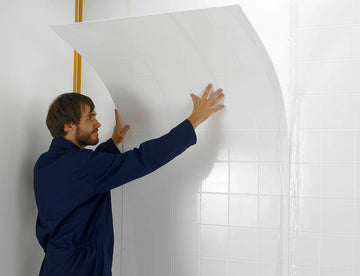
How to fit Reco panels
Designed to be cut and fitted by competent DIYers, you don’t need any specialist skills. For a quick demonstration, watch our video on how to fit wall panels before you begin. Here are some more pointers:
- Begin in the corner: Although not essential, we recommend that you purchase ‘Reco Backing Strips’ with your order. To begin the job, fold one of these 2495x50mm PVC strips to make a right angle down the length. Apply the adhesive strip into the corner, using a level to ensure it’s plumb. This straight edge ensures all your panels fit together without any issues and keeps the corner completely waterproof.
- Covering existing tiles: When using Reco panels to cover an existing fully tiled wall, simply cut the panels to length, apply the adhesive, and fix them in place. For partially tiled walls, you’ll need to batten the non-tiled part first to make it level with the tiles, then apply the adhesive and stick the panels to the wall.
- Joining Reco panels. Reco panels are designed to be installed with vertical joints using our patented seamless waterproof joining system. First, mark the position of all your panel joins on the wall and apply the high-tack ‘Reco Seal Tape’ down the middle of each join line. When you offer up the first panel, it should cover half of the tape. Apply adhesive to the back of the panel and fix it in place. Now apply a 3mm bead of silicone to the exposed tape, down the length of the join. Apply the adhesive to the next panel, butt it up to the join, leaving a 2mm expansion gap, and press into place. Finally, clean the joint using your wet finger or a suitable tool, leaving a small silicone blob at the bottom.
- Joining panels to shower trays and baths: Either fit your Reco panels before installing your bath or shower tray or, if retrofitting our panels, apply a bead of silicone to where the unit meets the wall, then fit the panel so that it beds into the wet bead. Next, fill the bath or shower tray with water or heavy objects before applying a 3mm silicone bead to the front of the join and smoothing in the usual way. The weight in the bath or shower will help stop the silicone stretching and splitting at a later date.
- Make sure the edges look neat: Reco panels have ready-rounded edges, so they’ll always look neat. That said, if you want to add an extra finish to any external edges, use Reco Edge Trim or a standard tile trim of up to 5mm. If you need to cut your panels into the corner, simply abutt the cut edges, joining in the way described above and leaving the rounded edges to the outside.
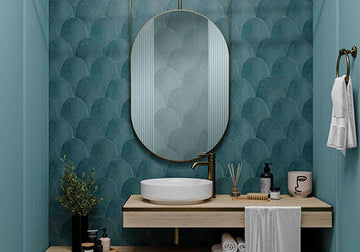
Reco panels are incredibly versatile, lightweight, strong and waterproof. What’s more, they’re easy to fit in just a few hours, and significantly cheaper than traditional tiles. Next time you’re after a luxury tile or stone finish without the cost or weight of the real thing, check out the stunning range of options here at Reco Surfaces.